Contents
Introduction
In this article I’ll describe my on how I set up Plex with an automated Request Service (Ombi) and Indexers/Torrent feeds (Sonarr, Radarr, Jackett) with the download Client (qBittorrent) to download and place the content in the correct folders. All this is accomplished with a Raspberry Pi, Docker and a helpful GitHub-Repository by Mariusz Krezel.
My Setup
- 1x Raspberry Pi 4 8GB with Ubuntu 20.04
- Docker and Docker-Compose
- Portainer
- Git
- Plex Media Server
- 2x external WD Hard-Drives
Clone the repository
First of all clone the repository as is and don’t change the name
git clone
cd LMDS
ls -l
The contents of the repo should now be displayed in your terminal
michalis@michalis-ubuntu:~/LMDS$ ls -l
total 80
-rwxrwxr-x 1 michalis michalis 14409 Aug 14 12:46 deploy.sh
-rw-rw-r-- 1 michalis michalis  2783 Aug 17 23:23 docker-compose.yml
-rw-rw-r-- 1 michalis michalis  2131 Aug 14 13:32 docker-compose.yml.save
-rw-rw-r-- 1 michalis michalis 35149 Aug 14 12:46 LICENSE
-rw-rw-r-- 1 michalis michalis  5784 Aug 14 12:46 README.md
The deploy.sh Script has around 15 Services that are ready to be installed just a click away.
Run the script and start containers
Start by running the script.
./deploy.sh
Then move down to Build LMDS Stack and click all the services you want. Seeing as I need indexers (Sonarr, Radarr), a Handler Client (Jackett) and my torrent downloader (qBitttorent) I choose these.
The containers will be made but before they can be spun up, the docker-compose.yml File needs to be edited with our values. I do my editing with the text editor nano and therefore I press CTRL + < to Replace text. The text that needs replacing is as follows
- TZ=UTC to TZ=Europe/UTC
- ./media/tv_shows:shows = [/path/to/seriesfolder]:shows
- ./media/movies:movies = [/path/to/moviesfolder]:movies
- ./media/downloads:downloads = [/path/to/downloadfolder]:downloads
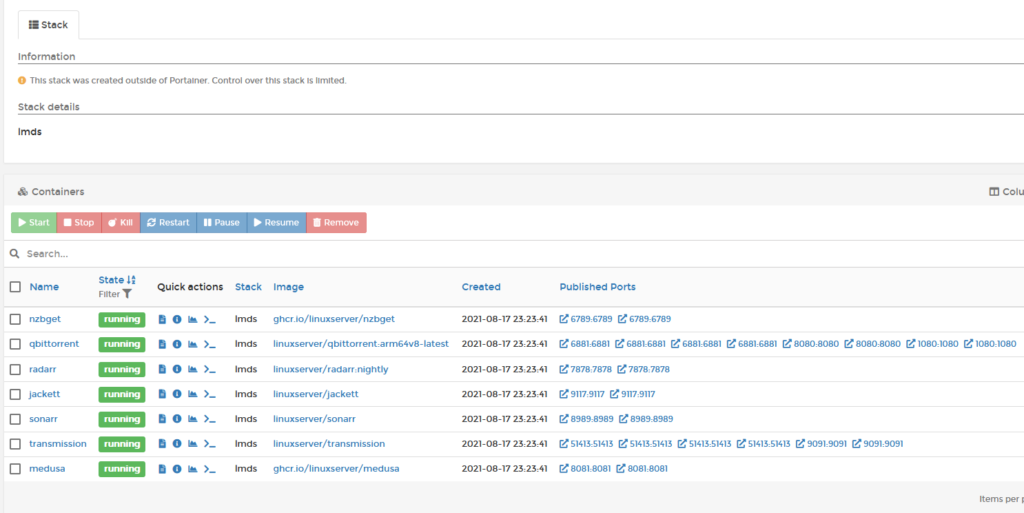
The containers can be seen in Portainer under the automatically built Stack LMDS.
Configure the containers
A pre-requisite to the next part is an up-and-running Plex Server with set libraries and Portainer.
Jackett
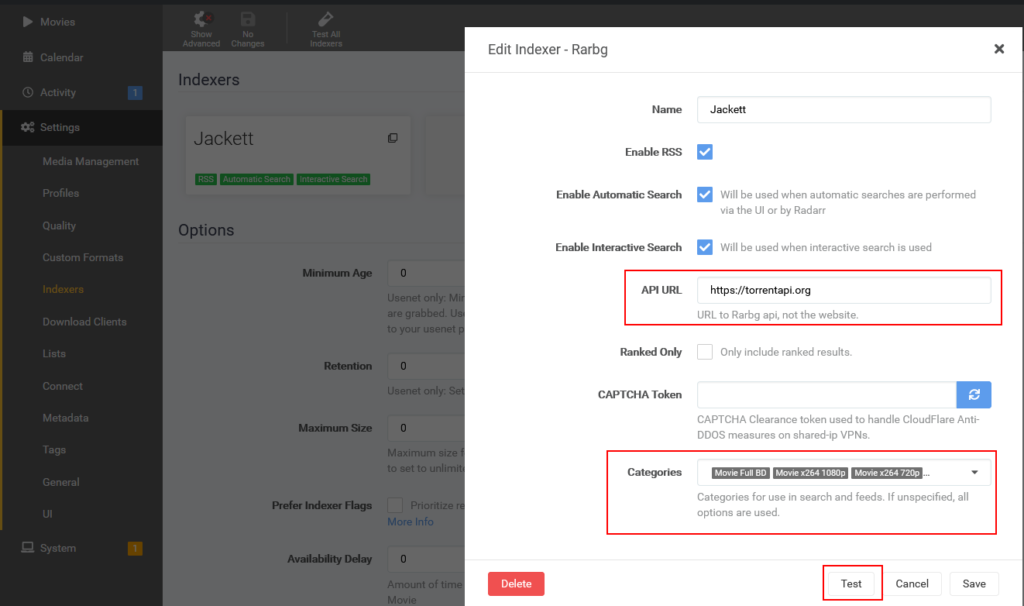
First we configure Jackett and to access it we go to [IP]:9117. You then have to add your indexer of choice and configure it quickly. I’ve used RARBG as my indexer and the configuration, that’s accessed by clicking the blue wrench symbol.
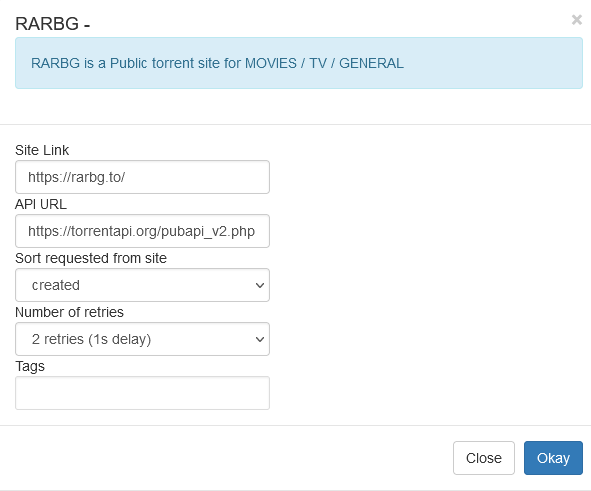
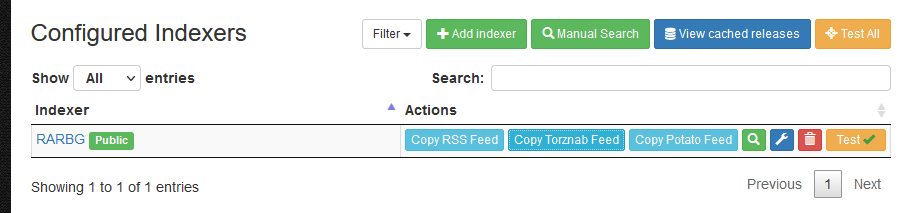
After successfully Testing the connection to the RARBG API, I copy the TORZNAB Feed link using Copy Torznab Feed.
Radarr
After configuring Jackett the next service I’ll set up is Radarr (you can also continue with Sonarr, seeing as they’re basically the same). To configure Radarr, first access it on [IP]:7878
Authentication
After logging on with admin / admin, please go to System > A and change
Linking Indexers with Radarr
First you need to link Radarr with Jackett (by way of API authentification). To do this, you simply go to Settings > Indexers > Add new > Select RARBG.
Add 2nd Indexer
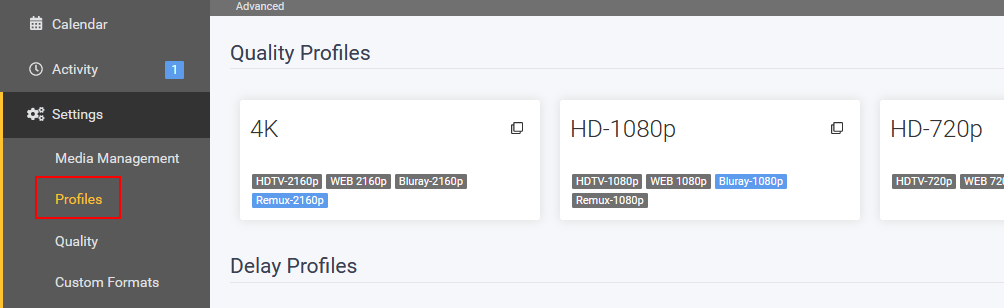
Configuring the Quality Profiles
After adding the indexers, you can edit the Quality Profiles that define the video quality of the downloaded content. The blue tag is the threshold (i.e the lowest allowed value). The default configured ones were too many, so I just configured these two. (NEW PIC)
Sonarr
To access Sonarr on [IP]:8989
Configuring Sonarr
Linking Indexers with Sonarr
First you need to link Radarr with Jackett (by way of API authentification). To do this, you simply go to Settings > Indexers > Add new > Select RARBG.
Configuring Quality Profiles
After adding Jackett, you can edit the Quality Profiles that define the video quality of the downloaded content. The blue tag is the threshold (i.e the lowest allowed value). The default configured ones were too many, so I just configured these two. (NEW PIC)
Media Management
qBittorrent
qBittorrent is accessed by its WEBUIPORT in the docker-compose File. After accessing [IP]:15080
[NEWPIC]
qbittorrent:
    image: linuxserver/qbittorrent:arm64v8-latest
    container_name: qbittorrent
    environment:
      - PUID=1000
      - PGID=1000
      - UMASK=022
      - WEBUI_PORT=8080
    volumes:
      - ./volumes/qbittorrent/config:/config
      - /mnt/my_book/media/downloads:/downloads
    ports:
      - 6881:6881
      - 6881:6881/udp
      - 8080:8080
      - 1080:1080
Ombi
To configure Ombi, go on it at [IP]:3579
Setup
Sign in using Plex authentication
[PIC]
Link Sonarr & Radarr
To link all the programs up and get an automated and fully capable system up-and-running we need to link Jackett to Sonarr and Radarr, so that the Requests from Ombi are dealt with.
For this go to Settings > Movie > Radarr and enter the details of the Radarr instance
Test Download
To test that all the components work, go to Ombi and request a movie / TV show. After clicking on the movie, you can click on Request. The 2 mandatory values that need to be filled are the User and the Quality Profile, that we configured in these chapters.
[PIC]
Tips
For the administration
Leave a Reply